ps version
    1   +5V
    2   gnd
    3
    4
    5
    6
    7   out 1 = low-low    (temperature)
    8   out 2 = low        (temperature)
    9   out 3 = high       (temperature)
    10  out 4 = high=high  (temperature)
    11  analog out         (temperature)
    12  n.c
    13  low flow trip
    14  high flow trip
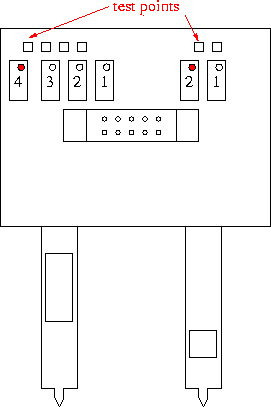
The setup of the temperature chip (16-pin chip, left 4 pots) is identical to
that of the Tx sensors, except that on the TxFx
sensors, the pots are in order, and for all four, clockwise increses the
setpoint.
For the flow sensor (8-pin chip, right 2 pots): The one you want is 14:high flow (called over-bar on the tmp14 data sheet). With the air flowing, I turn pot#2 so that the the 'high flow trip' line just switches from 0 to +5V. Then when you stop the airflow, the line should go from +5V to 0V. On the bench here that point is close to where the testpoint reads 1.56V.
By the way, the 'standard' flow speeds are set by inserting the anamometers in the 2" lines coming out of the heat exchange box. The plenum line should read about 13.4 m/s, and the volume line (the one with the big valve) should read about 3.3 m/s. The sum is regulated by setting the motor voltage, and the ratio between the two is set by using the big valve in the volume line. After this has been established, it is recommended that the anemometers be replaced by the equivalent pieces of pipe (should be there).
Don't forget to turn off the anamometers.